How to Set Up a Fishing Rod
Fishing can be a serene hobby or an exhilarating sport, but it all starts with the right setup. A fishing rod is more than just a stick with a line—it’s crafted for performance, sensitivity, and flexibility. Knowing how to set it up properly is crucial for success. Whether you’re new to fishing or need a refresher, this guide will walk you through setting up a fishing rod.
Gather Your Equipment

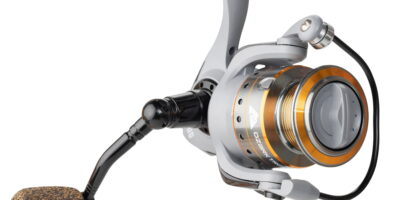
Before you begin, gather all necessary equipment. First, select the right type of rod. Fishing rods vary based on the type of fishing you’re doing. You’ll need a spinning rod for light tackle and casting lures, a baitcasting rod for heavier lines, or a fly rod for fly fishing. Pick a reel that matches your rod. The reel should fit comfortably in your hand and be appropriate for the kind of fishing you’re planning.
- Fishing rod
- Reel
- Fishing line
- Hooks
- Bait or lures
- Scissors or a line cutter
- Weight and bobbers (optional, depending on fishing style)
Assembling the Rod
Align the guides on each section of the rod, ensuring they form a straight line. This ensures the line will run smoothly. Assemble the rod sections by inserting the small end of one section into the larger end of another. Push them together until they fit snugly, but avoid using excessive force, which might damage the rod. Check that the guides remain aligned once the rod is assembled.

Choosing and Stringing the Line
Fishing lines come in different strengths and materials, each suited to specific types of fishing. Monofilament is versatile and forgiving, while braided lines offer greater sensitivity and less stretch. Determine what kind of fishing you’re doing, and choose your line based on water conditions and target species.
With the rod assembled, attach the reel. Secure the reel in the reel seat at the base of the rod and tighten it. Open the bail arm of the spinning reel. If it’s a baitcasting reel, release the spool. Feed the line through the rod guides, starting at the tip and working down toward the reel. Take care to thread the line in order, ensuring it runs freely and doesn’t snag.
Tying the Knot
Once the line is through the guides, you’ll need to attach it to the spool of the reel. A simple knot, such as the Arbor knot, works well. Wrap the line around the spool, tie an overhand knot, and secure it with a secondary knot on the tag end of the line. Reel in to remove any slack while ensuring the line lays evenly across the spool.
Adding Hooks, Weights, and Bobbers
For a successful fishing trip, attach the appropriate tackle. Start by tying the hook to the line, using a knot suited for fishing, like the improved clinch knot. For this, pass the line through the hook eye and wrap it around itself five to seven times. Pass it back through the loop and pull gently to tighten.
Add weight to the line if fishing in deep water or with fast currents. Use a secure slip or split shot sinker a foot or so above the hook, clamping it gently on the line. Finally, adjust a bobber to the line as needed. Clip it on above the weight, allowing you to control how deep your bait sinks.
Testing the Setup
Once everything is assembled, test the setup. Extend a few feet of line, cast gently, and see how the rod and reel behave. The line should unspool smoothly without tangles or snags. Test the drag system on the reel by adjusting it to see how the resistance feels when pulling the line. Make adjustments based on your fishing style. A properly set drag helps tire out fish without breaking the line.
Final Tips
Check weather and tide reports, and know your fishing environment. Ensure your equipment is cleaned and maintained to avoid future issues. Store your rod correctly when not in use to maintain its condition.
Understanding why and how each component of your fishing rod setup works can enhance your experience. With the right preparation, patience, and practice, you’ll be more confident in your fishing adventures.
Recommended Fishing Gear
Garmin GPSMAP 79s Marine GPS – $280.84
Rugged marine GPS handheld that floats in water.
Garmin inReach Mini 2 – $249.99
Compact satellite communicator for safety on the water.
As an Amazon Associate, we earn from qualifying purchases.


Subscribe for Updates
Get the latest articles delivered to your inbox.
We respect your privacy. Unsubscribe anytime.