How to Clean Saltwater Fish — From Catch to Cooler in 10 Minutes
Learning how to clean saltwater fish properly is one of those skills that separates a decent fishing trip from a great meal. I’ve been fishing the Gulf Coast for going on twenty-two years now — redfish in the marsh, snapper on the ledges, flounder in the passes — and I still see guys at the cleaning station making the same mistakes I made when I was starting out. Hacking through rib cages. Skipping the bleed. Putting fish straight into a dry cooler like they’re storing groceries. This guide is everything I wish someone had told me back then, and it goes deeper than the usual “make a cut behind the gills” advice you’ll find everywhere else.
General Cleaning Steps — Every Saltwater Fish
Before you ever get species-specific, there’s a baseline process that applies to every saltwater fish you’re going to put in a cooler. Get these steps wrong and it doesn’t matter how good your technique is on the fillet table — the fish will taste off.
Bleed the Fish First
The single most impactful thing you can do is bleed the fish immediately after landing it. Cut the gill arches on both sides and toss the fish in a bucket of saltwater for two to three minutes. That’s it. The blood is what causes the fishy flavor and the grayish discoloration in the meat. A properly bled snapper fillet looks almost white. An unbled one looks like something went wrong. I skipped this step for years because nobody told me it mattered — and every fillet I made tasted stronger than it needed to.
Scale or Skin — Know the Difference
Not every saltwater fish gets scaled. Snapper and grouper have scales you want to remove if you’re planning to cook them skin-on. Use a dedicated scaler — I use a Rapala Fish N Fillet scaler that runs about $8 at most tackle shops — and work from tail to head against the grain. Redfish skin is thick and edible but often skipped by people who don’t like the strong flavor it carries. Flounder skin is delicate and some people leave it on, but more on that in the next section.
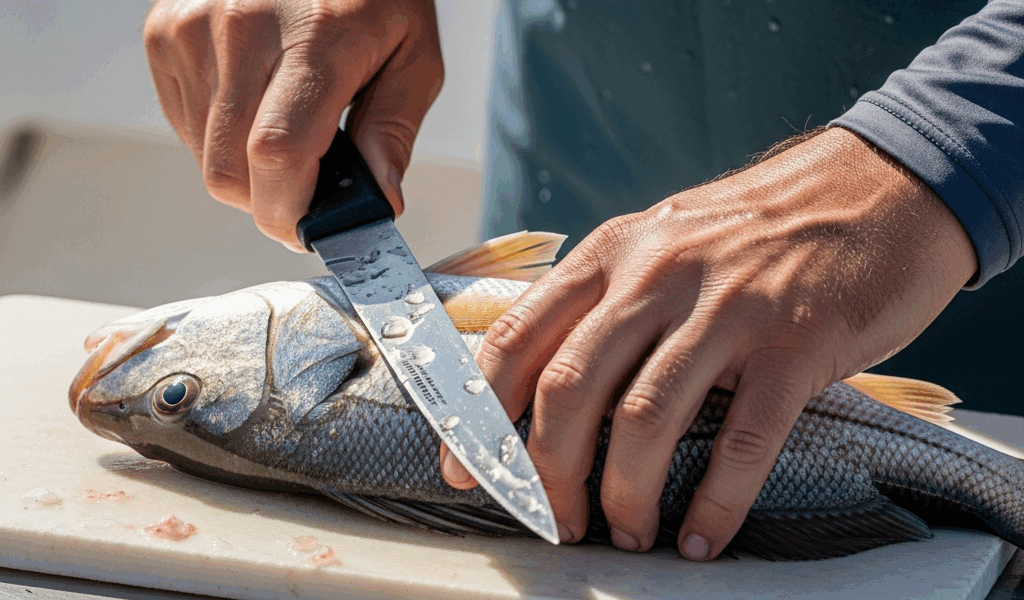
The Basic Fillet Process
- Bleed first, always.
- Rinse the fish in clean saltwater or fresh water.
- Scale if cooking skin-on, skip if skinning out the fillet.
- Make your entry cut just behind the pectoral fin down to the spine.
- Run the blade along the spine toward the tail using long, smooth strokes.
- Work around the rib cage — never through it.
- Remove the skin by pressing the fillet flat and running the knife between skin and meat at a shallow angle.
- Trim the bloodline and any dark meat along the lateral line.
- Rinse, pat dry, and bag or ice immediately.
That whole process, once you’ve done it fifty times, takes under three minutes per fish. Two fish at once and you’re under ten minutes total start to finish.
Species-Specific Filleting — Snapper, Redfish, Flounder, Grouper
Here’s where most online guides fall short. They treat every fish like it’s a largemouth bass. Saltwater fish have wildly different bone structures, skin thicknesses, and body shapes — and your technique needs to adapt.
Red Snapper
Snapper is a round-body fish with a relatively large rib cage and thick, firm meat that holds up well to a fillet knife. The key with snapper is knife angle on that initial spine cut. You want the blade nearly flat — maybe five degrees off horizontal — so you’re riding the spine rather than dipping into it. Dip too low and you’ll nick the spine and feel drag. Get that angle right and the knife glides. Use a flexible 7.5-inch fillet knife for snapper under three pounds; step up to a 9-inch semi-flex or rigid knife for anything bigger. The ribs on larger snapper are prominent, so make a deliberate arc around them rather than trying to cut through. You’ll lose yield trying to rush that section.
Redfish
Redfish have a thick, tough skin and a very distinct bloodline running along the lateral line. That bloodline has a strong, muddy flavor that a lot of people mistake for the fish itself tasting bad. It’s not the fish — it’s the bloodline you left on. Trim it out entirely. Go about a quarter inch on either side of that dark red strip and remove it completely. Redfish also respond well to the “redfish on the half shell” technique if you’re grilling — score the skin side, leave the scales on, and cook scale-side down. The scales act as a natural barrier and the meat steams inside. But for clean fillets, skin off and bloodline out is the move.
Flounder — The Different One
Flounder is the fish that trips up new anglers the most. It’s a flat fish with a completely different body plan — two fillets per side, four fillets total off one fish. Make your first cut straight down the lateral line from head to tail. Then run the blade outward toward the fin line, keeping it parallel to the fish’s body (which is horizontal, not vertical like a round fish). You’re essentially peeling the meat off the skeleton in two panels per side. Flounder meat is delicate and tears easily, so slower is better here. A 7-inch flexible blade works better than anything rigid. Surprised by how much meat comes off a flounder once you get the technique right — a two-pound fish gives you four clean pieces of beautiful white meat.
Grouper
Grouper is the big one, literally and figuratively. Gag grouper and red grouper both have thick, dense fillets with a large central bone structure. For grouper over five pounds, a flexible knife actually works against you — you want a semi-rigid 9-inch blade so you have control over the whole length of the cut. The skin on grouper is tough and not worth keeping. Make your spine cut deep and deliberate, follow the ribs with a clean arc, then flip the fillet and use a firm pressing motion to run the skin off. Grouper also has a very mild bloodline compared to redfish, but trim it anyway. The meat should be bright white throughout when you’re done.
Cleaning on the Boat vs At Home
Probably should have opened with this section, honestly — because your workspace setup determines how efficiently everything else goes.
On the Boat
If you’re cleaning fish on the water, you need a dedicated cutting board that won’t slide. I zip-tie a Ranger 24-inch poly cutting board to the gunwale rod holder rail — $22 at Bass Pro. Keep a spray bottle filled with saltwater to rinse the board between fish. Your knife needs to be sharp before you leave the dock, not after. Bring two knives: one 7.5-inch flexible and one 9-inch semi-rigid. A sharpening steel takes up almost no space and pulls its weight on long trips. Dispose of carcasses legally — most states require you to toss them in open water away from shore, not the marina. Check your state regs before you go.
At Home
At home you have more options. A dedicated fish cleaning table with a hose hookup is the ideal setup — Fish Mate makes a good folding model that runs around $65. If you’re processing more than twenty fillets, an electric knife earns its keep fast. The American Angler PRO electric fillet knife with the 10-inch blade handles grouper and large snapper without hand fatigue. For smaller fish and precision work, stick with a manual knife. Set up near a drain, use a trash bag lined bucket for carcasses, and rinse constantly. Cold water from the hose keeps fillets firm while you work.
How to Keep Fish Fresh Until You Clean Them
The fillet is only as good as the handling between catch and cleaning table.
The Ice Slurry Method
A dry ice cooler is not cold enough. You want an ice slurry — ice plus enough saltwater to create a slushy mixture that surrounds every fish completely. The slurry pulls heat out of the fish three times faster than dry ice contact. Use a 2:1 ratio of ice to fish by weight. A 54-quart Yeti or equivalent cooler handles about 15-20 pounds of fish comfortably with proper ice. Pre-chill the cooler with ice for thirty minutes before the trip if you can.
When to Gut on the Boat
On day trips under four hours, bleeding and icing is enough. On longer offshore trips — eight hours, overnight runs — gut the fish on the boat. The gut cavity holds heat and bacteria even in a well-iced cooler. Remove the entrails, rinse the cavity, and put the fish back in the slurry. This is non-negotiable on warm days above 85°F.
Time Limits
- Properly bled and iced fish — 48 hours before quality starts dropping
- Ungutted fish on a long trip — quality degrades in as little as 8 hours
- Fish in a dry cooler without slurry — clean within 4 hours or accept the consequences
Common Mistakes That Ruin Good Fish
Every one of these I’ve either done myself or watched someone else do at the cleaning station.
Not Bleeding Immediately
Already covered this above, but it bears repeating because it’s the highest-impact mistake on the list. The first five minutes after landing a fish matter more than anything you do at the cleaning table. Bleed it. Every time.
Not Enough Ice
People chronically underestimate how much ice they need. If you can see the fish through the ice, you don’t have enough. Double what you think you need on hot days. Ice is cheap. Ruined fish is expensive — both in dollars and in the wasted time you spent catching it.
Cutting Through the Rib Cage
This is a pure technique problem. Forcing the blade through the ribs instead of arcing around them leaves bone fragments in the fillet and destroys the meat near the belly. Take the extra four seconds to make a clean arc. Your guests will notice the difference.
Leaving the Bloodline
On redfish especially, but true for most species — that dark lateral strip is the source of strong, off-putting flavor. It’s not the fish. It’s the bloodline. Trim it completely. Run your thumb along the fillet after you think you’ve trimmed it and feel for any remaining dark tissue. If you feel it, cut it out.
Washing Fillets Too Early
Rinsing fillets in fresh water before you’re done processing dries out the surface and speeds up bacterial growth. Rinse once, at the very end, right before bagging. Keep the fillets cold and dry throughout the process and give them one final rinse right before they go into a Ziploc or vacuum bag for the freezer.
Fishing is the easy part. Cleaning is the skill that actually determines what ends up on the plate. Get the fundamentals right, learn the quirks of the specific species you’re targeting, and the rest of it takes care of itself.

Stay in the loop
Get the latest saltwaterspots.com updates delivered to your inbox.